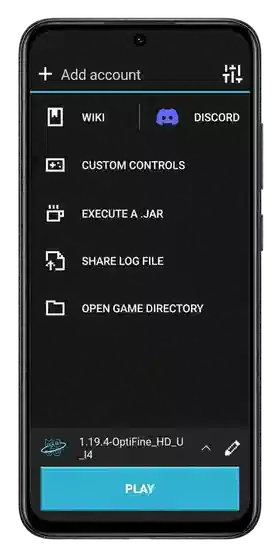
Some players enjoy trying different Minecraft versions. Others want to build a modded world or spend a little more time getting their controls just right. If you like exploring these settings, Mojo Launcher gives you plenty to work with.
You can set up Mojo Launcher on your computer using an Android emulator. This gives you room to explore the launcher on a larger screen while using your keyboard and mouse.
In this article, we will cover its features, how to install it with an emulator, and a few useful settings to check before you start playing.
What Is Mojo Launcher PC?
MojoLauncher, also known as MJLauncher, is a Minecraft Java Edition launcher based on PojavLauncher. It brings version selection, mod support, controls, and game settings together in one place.
For a PC setup, the emulator provides the Android environment where you install and open MojoLauncher. Once it is set up, you can create a profile, choose your Minecraft version, and configure the game from inside the launcher.
Key Features of Mojo Launcher PC
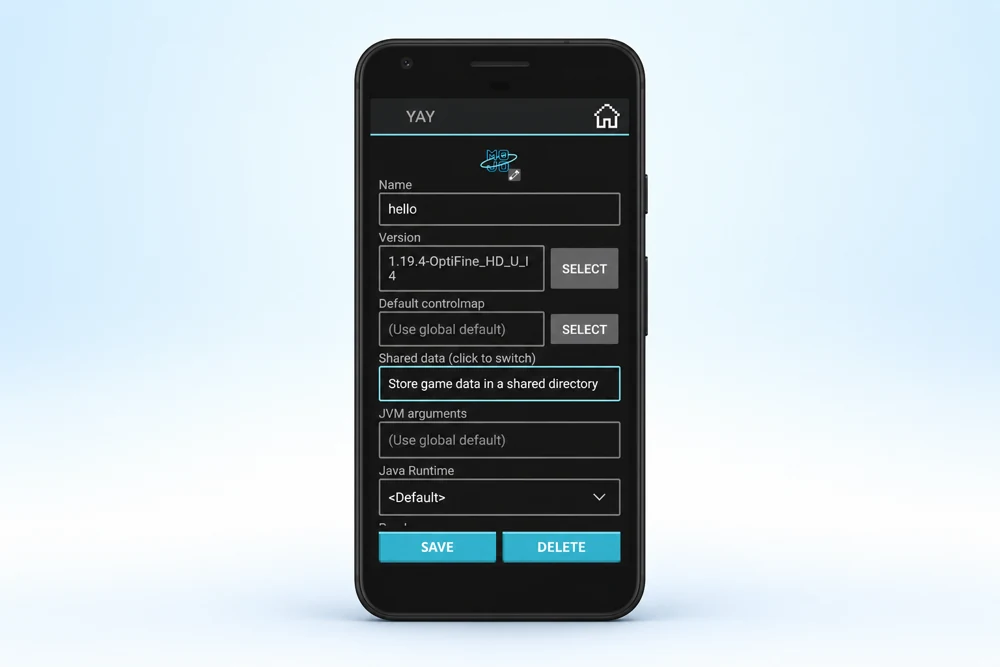
Minecraft Versions and Game Profiles
Choose the Minecraft version you want to play and keep its settings in a profile. This is useful when you want one setup for a familiar world and another for trying a different version or a modded game.
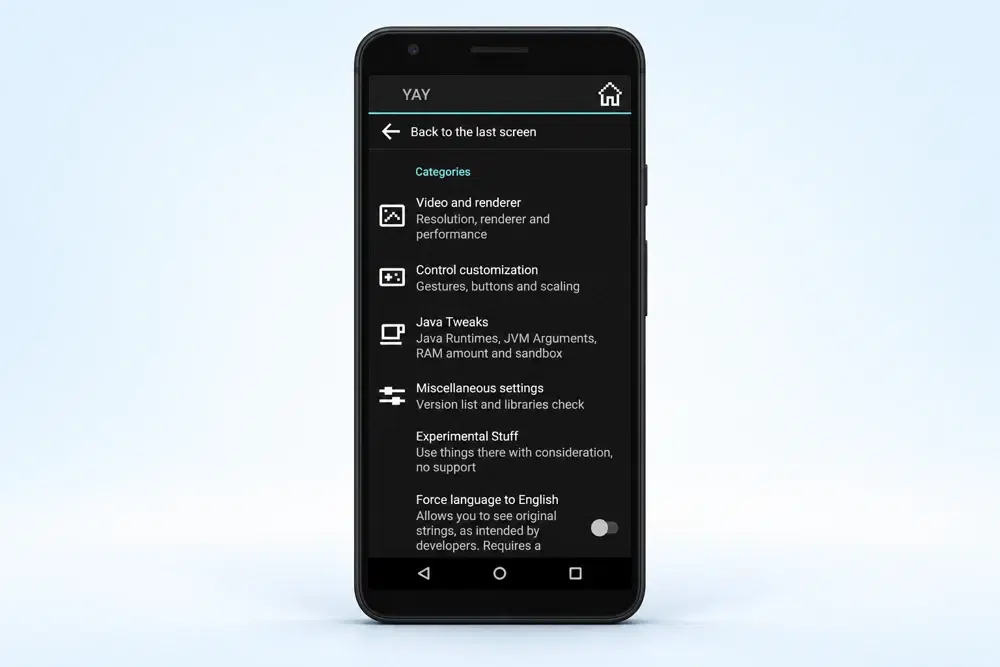
Keyboard, Mouse, and Control Settings
Use the emulator’s input settings alongside MojoLauncher’s controls to find a layout that feels comfortable. Test movement, camera controls, inventory, and chat before settling into a longer session.
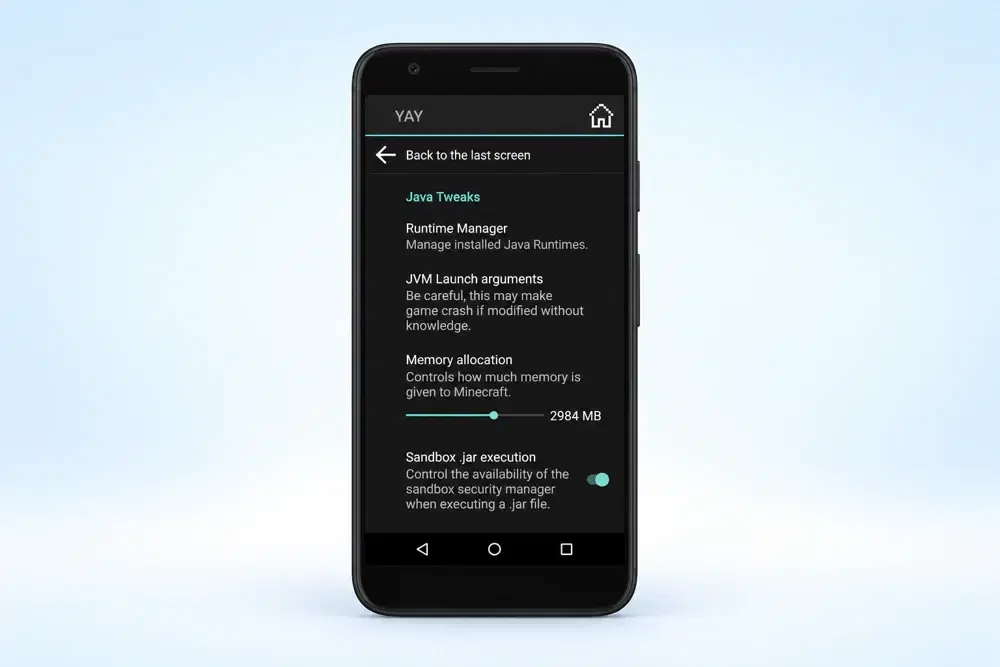
Graphics, Java, and Memory Options
Adjust your renderer, Java runtime, and memory settings to suit the Minecraft version you are using. Start with a simple setup, then change one setting at a time so you can see what actually helps.
Forge, Fabric, and Mod Support
MojoLauncher supports mod loaders such as Forge and Fabric. These let you add compatible Java Edition mods, whether you want new items, different gameplay, or a change in the look of your world.
The important part is matching the versions. A mod, its loader, and your selected Minecraft version need to work together. Keep an unmodified profile as well, so you have an easy way to check whether a problem comes from the game setup or a newly added mod.
Modpack Import
Supported launcher builds can import local Modrinth .mrpack files and CurseForge .zip modpacks. A pack brings several mods and settings together, which can save you time compared with adding everything individually.
What You Need Before Installation
Choose an Android emulator that supports your Windows or Mac computer. Check its system requirements, enable hardware virtualization if its setup instructions require it, and leave enough storage for the emulator, launcher, game files, and mods.
Also check that the emulator’s Android version and CPU architecture suit the launcher package. Graphics support matters too, especially when you move on to newer Minecraft versions or larger modpacks.
How to Install Mojo Launcher on PC Using an Emulator
- Install your chosen Android emulator and complete its initial setup.
- Start a compatible Android virtual device and connect it to the internet.
- Download the MojoLauncher APK using the button on this page.
- Use the emulator’s Install APK option to select the downloaded file. With Android Studio’s emulator, you can drag the APK onto the running device window.
- Wait for installation to finish, then open MojoLauncher from the emulator’s app list.
- Complete the supported Minecraft account sign-in when required.
- Select a Minecraft version and let the launcher download its game files.
- Check the graphics settings and controls, then launch the game.
The first launch may take a little longer while files are being prepared. Give it time to finish before adding mods or changing advanced options.
Setting Up Your First Game
Begin with a basic Minecraft profile and check that it opens properly. Walk around, open your inventory, and try the camera controls. This quick test helps you spot input or graphics problems before you spend time setting up a world.
After that, adjust render distance and memory gradually. Keep enough RAM free for the emulator and the rest of your computer. If you change several settings at once, it becomes much harder to work out which one improved the game.
How to Add Mods
- Choose the Minecraft version you want to use.
- Set up the matching Forge or Fabric loader.
- Add mod files made for that same version and loader.
- Start the profile and check that the mods load correctly.
- Back up your worlds before making bigger changes to a modded setup.
You still need the appropriate Minecraft game access. Installing a launcher, emulator, or modpack does not replace that.
Simple Fixes for Common Problems
If the game closes during startup, try your unmodified profile first. Then check the Java runtime, renderer, and version of any recently added mods. For a black screen, review both the emulator’s graphics settings and the renderer selected in MojoLauncher.
If controls feel awkward, test the emulator’s keyboard mapping and the launcher layout together. For slow performance, reduce render distance, close other demanding applications, and review memory allocation. Our troubleshooting guide covers more general fixes.
Conclusion
Mojo Launcher gives you a way to explore Minecraft versions, mods, and game settings from one launcher. Set up your emulator, test a simple profile, and build up your preferred configuration gradually. A few careful adjustments at the start can save you a lot of trial and error later.
For more guides, visit the Mojo Launcher homepage or read about Mojo Launcher for iPhone and iPad.